28 March 2013

A COOKIE WITH A HIDDEN SUPRISE

Last year I saw multiple photos of these cookies across many a tumbler page. I made them for a class once and they went down a treat. So after recently reading Anna's 'The Cookie Monster' post, I quickly had a craving for cookies and knew Oreo cookies would be the perfect ones to make.

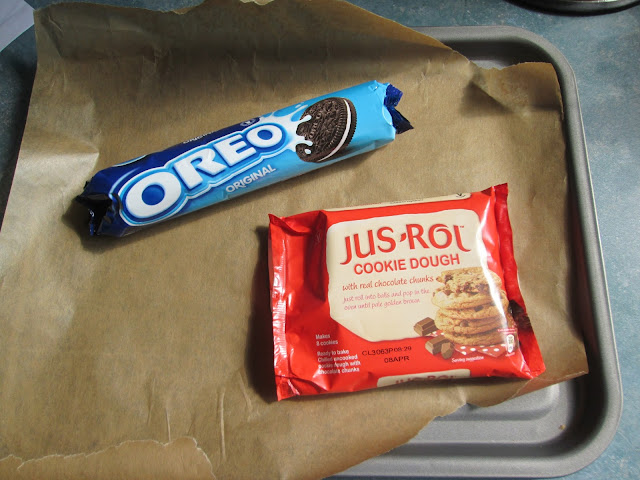
These are so so easy and also taste amazing! You can make you're own cookie dough for these (hundreds of recipes online) or use shop brought if you're in a bit of a rush (or prefer a super easy option).
All you need is:
- Cookie dough
- Baking tray
- Grease proof paper
- A pack of Oreos,
With this one packet of cookie dough I was able to make 6 cookies.


1. Preheat your oven to the temperature shown on the packet of cookie dough.
2. Take two chunks from your cookie dough. You're simply going to place one chunk on top of an Oreo and another on the bottom of the same Oreo.
3. Make sure that all of your Oreo is covered in cookie dough especially around the sides.
4. Once you've covered all of your cookies simply place them on a baking tray lined with grease proof paper. Then place the tray in the oven and wait for the amount of time that is stated on the instructions.
5. Once they've baked take them out of the oven and wait for them to cool.
And that's it! The hardest thing about making these cookies is having to wait for them to cool down enough so you can pick one up and eat them!


Thank you very much reading and I hope you enjoy if you choose to make them!

26 March 2013

DIY PHONE CASE

After recently purchasing some washi/paper tape from Paperchase scrapbooking, I wanted to see if there was any other use for these little rolls of Japanese tape. I soon stumbled across some posts (this one and this one) showing how you can use paper tape to decorate your phone. So, I had a free 5 minutes the other morning and decided I would set about revamping an old phone case.
For this super quick and simple DIY all you need is:
- Scissors
- A hard phone case (best place I would suggest for a cheap one would be eBay)
- Paper tape. This can be found in numerous styles also on eBay. This pack of 6 is from Paperchase - £6.


1. Take your first strip of tape. I would suggest to work with the larger sizes first, then work down to the smaller ones. You can lay the tape in anyway you like, I just went for a simple diagonal stripes for mine. Simply apply the tape to the back of the case, leaving some excess at the ends to tuck under. Also when you have applied the tape try and get all of the air bubbles and lumps out from under the tape to avoid it lifting or peeling away.
2. Take your next strip and repeat the same process as in the first step. I decided to leave a little gap in between each of my strips as I really like the look it gives.
3. Keep repeating with each of your colours that you want to use until all of the phone case you wish to cover is covered.
4. Then all you need to do is place the case on your phone and that's it, a revamped phone case that took no time at all!

Two other ways in which you could use paper tape to decorate a phone case are:
- If you have a removable back cover on your phone you could simply apply the tape directly to the phone back and then place a clear phone case over the top (extremely easy to find on eBay) to protect your design.
- Alternatively, you could draw around your phone on a piece of card and then place the washi tape onto the card. Take a clear phone case and sandwich the piece of decorated card in between your phone and the case. This idea is perfect if you constantly like to change the way your phone looks as all you have to do is swap around the cardboard insert and you instantly have a new design on the back of your phone! I think this method would be slighter better with an iPhone as they have flat backs to them.

This is so quick and simple to do and because of the variety of styles and colours that paper tape comes in it really is such a great way to give your phone a bit of a revamp!

Thank you very much for reading!

12 March 2013

DIY BUNTING


This is a super simple DIY on how to create your own bunting from your favourites magazines.

All you will need:
- Magazines
- Ruler
- String
- Glue
- Pen
- Scissors

1. First go through your magazines and tear out any of the pages your fancy creating you bunting from. Adverts tend to work quite nicely as the majority have a lot of patterns.
2. Next all you need to do is select the section of the page you want a triangle of the bunting to be made from. Draw your triangles over the section you want. I made mine with a base of 10.5cm and the two other sides were 11cm in length. After you've cut 1 triangle you can then use this to create the rest, this makes sure that every section of your bunting in the same size.
3. Once you've cut all of your triangles out, all you have to do now is assemble your bunting. For this you can simply line the shortest side with glue (this short side will be the top) and then stick the thread on top to join all of the pieces together. Alternatively you can use small blobs of blue tack on the corners of the top side and then place the thread again across the top of the triangles.
4. And that's it! Simply stick it on your wall using blue tack and it's done.

And it's as simple as that! I only made a short string of bunting for the side of my wardrobe but I plan on making one much longer for my wall.